If you landed on this page and haven't read the first few parts I would
recommend at least starting on Part 2.
This is a multi-part blog post on how to recreate a hockey experience at
home. The experience we are going for is to have a goal horn, light, our
favorite teams song and of course food, drinks, and rally towels that one
would expect when you go to a game, it'll just be cheaper :).
In the last part we put together our web application, have it running and sort
of looking good, we can always improve upon it. Sadly where we left off was
the web app just printing a message to the screen.
So now let's make it do something!
If you remember from our hardware list I'm using a bluetooth speaker that I
had laying around the house that no one was using. Turns out that is a bit of
a pain in the @$$ and I'll be looking to replace that with a wired speaker in
the future, but if you got here and all you have is the bluetooth speaker
let's get it working.
Pair Up and Make The Play
One of the main problems with a bluetooth device is auto pairing the device to
our raspberry pi, and keeping that device powered on while it's not in use. I
mean nothing says "whomp, whomp" more than seeing Aho score a goal you reach
over tap the button on the web app, the light spins but no sound.
The raspberry pi has a utility bluetoothctl that we can use from
the command line to find our device and pair it. This should really be done
once so that we can tell the raspberry pi to trust the device.
From the terminal type in:
sudo bluetoothctl
Next, we want to turn on and set the default agent:
agent on
default-agent
Now put your device in pairing mode, some devices you can just hold the
power button till a blue light flashes or announces its in pairing mode but
check your manual if your unsure.
Once the device is in pairing mode we go back to our terminal and scan for the
device:
scan on
You should see a few devices pop-up that will look like the following:
When you see your device in the list copy the mac address, the 6 digits
separated by colons next to the name, then we want to pir to that device by
typing the following (use your device mac address).
pair FC:58:FA:B2:A5:85
You should see the device pair and hear an audible sound on your bluetooth
speaker. Next we want to add the device to our trusted device list. Type in
the following:
trust FC:58:FA:B2:A5:85
And finally to connect we type in:
connect FC:58:FA:B2:A5:85
When you are done just type in exit to get out of the bluetoothctl utility.
Now anytime we play a sound on our raspberry pi it should come through the
bluetooth speaker. But we still have an issue of auto-pairing the
speaker so that we don't have to type all that in everytime, we want to just
turn the speaker on and have sound.
We can auto connect with a helper script that will do this for us, then all we
need to do is have our app call the script and ensure we are connected to our
bluetooth device. So to our project let's add the a file called 'autopair' and
add the following to the file:
#!/bin/bash
bluetoothctl << EOF
connect FC:58:FA:B2:A5:85
EOF
After we save the file we need to make it executable, go to the command line
and type in:
sudo chmod +x autopair
Since the script is just a plain shell script we can run it separately from
the command line to test it is working. So let's turn on the bluetooth device
and run the script.
./autopair
You should hear the audible noise of the raspberry pi connecting and any sound
the raspberry pi plays should now come through the bluetooth speaker.
Now that we have the audio connected, how do we play the mp3 file(s) of our
horn and goal song? There are a few different options, I'll be using
VLC Player
as I'm a bit more familiar with it but we could have used the default
OMXPlayer. Since the vlc player is not installed by default we will need to run
apt-get in the following command to install the player.
sudo apt-get install vlc
VLC Player can be controlled from the command line with cvlc, our web app will
call cvlc and pass the mp3 file to it to be played. while it is playing we
want our goal light to be activated until the song stops. So let's create a
new script called goal.py, this script will be responsible for playing the
song and activating the light.
Let's create that goal.py file and add the following to our file:
import os, time
from gpiozero import LED
from signal import pause
led = LED(17)
def activate_experience():
led.on()
play_horn()
led.off()
def play_horn():
os.system('sudo ./autopair') # Ensure our speaker is still paired with our rpi
os.system('cvlc static/media/Carolina_Hurricanes.mp3 vlc://quit')
In the above code you can see we assign the GPIO pin 17 to the LED object.
While our rotating light is technically not an led the
LED object
is a basic switch with on/off functionality. While the object does contain
other functionality we will be using it as a simple switch.
The pin number will depend on which pin you have wired your raspberry pi to
the controller. In this example I'm using 17. If you are unsure of which
pin is which your raspberry pi should have come with a handy GPIO charts or
you can find your model and the pins
here.
While it may be a bit hard to tell from the picture we attach a ground wire to
a ground pin and the positive to pin GPIO 17 on the raspberry pi, then connect
the positive/negative sides to our controller. If you connect to a different
pin then just adjust the pin number used for the LED object in the code.
On thing, well actually a couple of things I really like about this controller
is it looks more finished than having a breadboard and a bunch of wires
everywhere and it has an "always on" plug so we can actually plug our
raspberry pi's power cable into it and keep everything a little more
self-contained. It would have been better if the raspberry pi's plug didn't
cover up our "normally on" plug but for this project we are only plugging on
thing in to be controlled so it'll work for now.
In the activate_experience method, we turn the light on, call the play_horn
method and then turn the light off.
In the play_horn method, we call our autopair script to ensure our bluetooth
device is connected to the raspberry pi then play the mp3 that contains the
goal horn and song. If you are playing the horn then song as separate mp3s
just add an additional line(s) to play your files. I like the idea of
modifying both into a single file as you can cross-fade and make the
experience more seamless.
The last step in this series is to call our goal.py code from the web app. To
do this we want to open the app.py file, add an import to the top of the file
so that we can call the script.
import goal
then in the same file find the line that matches:
print("Play Horn!")
and replace it with
goal.activate_experience()
Now our completed code should look like the following:
from flask import Flask, render_template, request
import goal
app = Flask(__name__)
templateData = {
    'title': "Carolina Hurricanes"
}
@app.route('/', methods=['GET','POST'])
def index():
if request.method == 'POST':
goal.activate_experience()
return
render_template("index.html", **templateData)
if __name__ == '__main__':
app.run(debug=True,
host='0.0.0.0')
That's it! The only thing left to do is place the tablet in an open area so
anyone can activate the experience. For the rotating bean, we tried several
places but found it works best behind the t.v. , it keeps it out of the way
and doesn't accidentally blind your family.
To complete our experience we had a good friend of ours use their cricut to
make some rally towels.
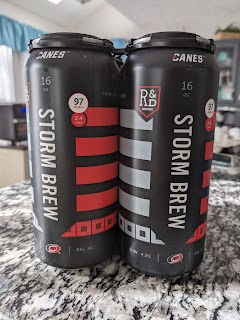
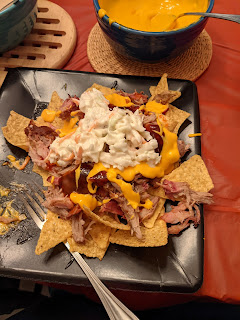
Finally, get some Storm Brew, fire up the smoker for some pulled pork bbq nachos
and other arena snacks and immerse yourself in the game.
And the next time Svech scores that Lacrosse goal....