Sunday, February 28, 2021

The Devops Case For Jupyter Note(Run)books

 With all the excitement watching NASA successfully land perseverance on Mars I thought if we can land a rover on Mars why can't we go to Jupyter.....Notebooks that is. The Jupyter project has been around since 2014 and used by Data Scientists and the scientific community for quite some time. Before we can dive into how we can use these notebooks for DevOps we first need an understanding of what they are and can provide.

What is a Jupyter Notebook?

A Jupyter Notebook in a nutshell is a special json file (*.ipjnb) that when rendered by a Jupyter Server renders as a web application that allows the user to blend content, data, equations, and executable code to create interactive notebooks that can be saved, shared, and exported into a number of formats. While most notebooks use the python programming language, Jupyter supports over 100 languages through its kernels.


Each notebook is made up of one or more cells. Each cell can hold markdown, code or raw content. Code cells are cells that are going to perform a task, using cell magic this could be to render html, write a file to disk or execute code written in any language you have a kernel installed for.

Code cells can even be used to install additional libraries and/or plugins to add additional functionality to your Jupyter notebooks and server.


When the example code cell below is run the html output is included on the notebook below the cell. Sometimes it may not make sense to show both the code cell (input) and the output, for this you can add the meta tag 'hide-input' which will collapse the code cell but still render its output.

Pretty cool stuff right. But I'm not a data scientist and don't really imagine myself rendering complex equations to study gravitational theories, so how does this all apply to a DevOps use case? 

DevOps Runbooks

Runbooks have been around in one form or another for a long time, Systems Admins have been using them for years as a way to share information between engineers in  the admin group and even other IT personnel. The format and medium for runbooks has changed over the years and can vary depending on your project and clients needs.

A standard runbook will contain at a minimum the following information:
  • Systems architecture and design diagrams
  • Technical Requirements for the system 
  • List of key personnel supporting the system
  • Troubleshooting workflows
  • List of common issues
  • Who to contact during outages and emergencies
  • List of all changes to the system
These runbooks are typically found on internal wiki or systems like Confluence the format and content may vary depending on who created them or updated them last.

Jupyter supports markdown as well so using a Jupyter notebook for static information is definitely possible and will give us the rich text output we need.  Jupyter notebooks go even further than just static content they allow us to have markdown and executable code on the same page. 

What this means is instead of having a wiki page that gives you step-by-step commands, SQL queries, etc that you hope are up-to-date and were copied correctly you can execute these directly from the notebook and evaluate the output. No more fumbling for credentials, ssh sessions, dealing with incomplete or incorrect commands.

So lets pick apart a typical wiki runbook and see how we could replace each bit. The first requirement is these notebooks need to be shareable. So far all we have talked about is jupyter notebooks which are typically single-user and can be run locally, what we need is a central server for running and sharing.

JupyterHub & JupyterLab

JupyterHub gives us a central hub to spawn single-user notebook servers on-demand so we don't need to tie up our local machines with running processes. The Hub also makes it easy for us to share these notebooks so we don't have to email them back-and-forth to each other in order to share them. 

The hub provides an authentication mechanism and proxy server so we can add additional users and share our notebooks between users. 

By itself, JupyterHub solves some of the core issues but still leaves off some functionality, such as how do we best manage our secrets. We can run JupyterHub and JupyterLab together to lay the groundwork for providing the functionality that we will need.

JupyterLab is the new enhanced web interface for jupyter notebooks, it provides a better interface where we can browse, create, and view multiple notebooks in a tabbed environment, open a terminal for quick access to a command line, install additional plugins and language kernels, etc.


In this post I won't go in to the how to install JupyterHub and JupyterLab, but if you are interested in setting up a quick POC or just want to try it out there are a few different options:

Shh! It's a Secret

A secret can be a password, token, identity, or any other piece of data that should not be known by everyone except those that need to know and should not be checked in to code repositories. 

In terms of DevOps, this could be a token used to deploy code to a client's production servers. There may be only one token that the team supporting the project should use. So the use of the token should be shared among the team.

Typical jupyter notebooks use environment variables to store and use secrets; while this prevents those secrets from being checked-in to a repo it does have some drawbacks. Environment variables are not the best use if we are to share our notebooks with other members of the team. The two major drawbacks to this approach are:
  • Each team member would have to create their own environment variables to hold the data.
  • Any time an environment value changed we would need to restart our jupyter server.

If your organization uses VaultAWS Secrets Manager or any other secrets manager implementation you can easily implement a python method to retrieve the secrets from your secrets manager and use them in your notebooks. 

If your not lucky enough to have access to a secrets manager another option would be to use IPython Secrets. The IPython Secrets library makes it easy to store and retrieve secrets from within your notebook. The library uses the python keyring project which utilizes the system's keystore or credential locker or a number of different backends to encrypt and store them. 

The nice thing about this approach is you can start using the system's default keystore and later migrate the backend to a 3rd party provided backend or a custom one.

Below is an example of how this could be done using IPython Secrets:

    from ipython_secrets import *
    import requests
    
    deploy_token = get_secret('DEPLOY_TOKEN')
    
    headers = {
     'PRIVATE-TOKEN': deploy_token
    }
    
    response = requests.request("GET",
      "https://gitlab.yourdomain.com/api/v4/projects/16/deployments",
       headers=headers)
  
The first call to 'get_secret()' will prompt for a password to the keyring, then if the key is not in use will ask us for the secret to store after entering the secret it will be removed from the front-end view. If the secret we are requesting already exists, after asking us for the keyring password, the secret is decrypted and assigned to our variable for use.


Head Stuck In the Clouds

One of the many DevOps tasks is managing your cloud instances whether they are running on GCP, AWS, Azure, or an on-prem Kubernetes cluster.  Jupyter Notebooks give us flexibility to run shell scripts, access the command line and run python code. 

With this type of flexibility we can install, configure and run the aws cli from a notebook or use the AWS SDK (boto3) to access AWS resources. In the example below we use a notebook to perform each command line entry that you would normally perform to download and install the AWS Cli. 


  The awscli is installed to the system running the notebook so we only need to perform those steps once then we can use it in our notebook code cells just like we would from any command line or script.


While the examples above are using awscli this could have easily been terraform, ansible or any other utility or SDK you need access to.


Descriptive Runbooks

So far we have seen examples of using different notebook cells for markdown and code and you may be thinking pretty cool but how does this make for a better runbook?

Below is an example notebook that shows using both markdown and code together to describe the solution and the code that will perform the task. 


In the above notebook there are four cells, two that contain markdown and two that contain shell scripts.


In this example we use the markdown cells to describe what each script will do and if there are any special considerations the engineer should be aware of prior to running the script.

The DevOps engineer can adjust the variables in the scripts in the notebook if needed or run it as-is right from the notebook.


After the engineer has run the script the output is displayed under the code cell and is saved with the notebook by default. While you can always clear the output(s) from the notebook, this does allow the engineer or senior engineer to go back and examine the output to determine if there are further issues.

Some sections of a runbook may contain sql or api calls to gather data to create reports or dashboards.

Dashboards

Some dashboards may be created and managed by the devops team but the main consumer of that dashboard may not be as technical so we don't always want the code cells to be available, some dashboards should only contain output.

Voila allows us to create interactive dashboards from notebooks but removes the code cells from the users.  Voila can be installed as a standalone app or as part of our Jupyter server. 

One example for this could be a report that displays all commits to a particular release branch so we can better track what is being deployed. Release notes or reports are an important part of every release so we can track what is changing or if issues arise later we can use the dashboard to see what all changed to the code and which developers committed that code.

Below is an example of this where we gather the commits from a particular branch for the date/time period of the sprint and display the output in an html table.


The output of the code cell displays all commits, who committed them, when, the url to that commit, etc. While it may be a bit much for release notes where Jira story IDs and short descriptions may be more suited for, this gives a better picture of everything that changed and following the links we can examine that code a bit more.


Conclusion

After reading through some of these examples it is easy to see the power and flexibility that Jupyter can bring to our runbooks. While these are just a few examples there is much more that could be done and many more extensions available or we could write our own if we can't find what we need.


Sunday, January 24, 2021

Hockey Experience Project - Part 4

 If you landed on this page and haven't read the first few parts I would recommend at least starting on Part 2.  

This is a multi-part blog post on how to recreate a hockey experience at home.  The experience we are going for is to have a goal horn, light, our favorite teams song and of course food, drinks, and rally towels that one would expect when you go to a game, it'll just be cheaper :).

In the last part we put together our web application, have it running and sort of looking good, we can always improve upon it. Sadly where we left off was the web app just printing a message to the screen.


So now let's make it do something!

If you remember from our hardware list I'm using a bluetooth speaker that I had laying around the house that no one was using. Turns out that is a bit of a pain in the @$$ and I'll be looking to replace that with a wired speaker in the future, but if you got here and all you have is the bluetooth speaker let's get it working.

Pair Up and Make The Play

One of the main problems with a bluetooth device is auto pairing the device to our raspberry pi, and keeping that device powered on while it's not in use. I mean nothing says "whomp, whomp" more than seeing Aho score a goal you reach over tap the button on the web app, the light spins but no sound. 

The raspberry pi has a utility bluetoothctl that we can use from the command line to find our device and pair it. This should really be done once so that we can tell the raspberry pi to trust the device. 

From the terminal type in:
sudo bluetoothctl

Next, we want to turn on and set the default agent:
agent on
default-agent

Now put your device in pairing mode,  some devices you can just hold the power button till a blue light flashes or announces its in pairing mode but check your manual if your unsure.

Once the device is in pairing mode we go back to our terminal and scan for the device:
scan on

You should see a few devices pop-up that will look like the following:


When you see your device in the list copy the mac address, the 6 digits separated by colons next to the name, then we want to pir to that device by typing the following (use your device mac address).

pair FC:58:FA:B2:A5:85

You should see the device pair and hear an audible sound on your bluetooth speaker. Next we want to add the device to our trusted device list. Type in the following:

trust FC:58:FA:B2:A5:85

And finally to connect we type in:

connect FC:58:FA:B2:A5:85

When you are done just type in exit to get out of the bluetoothctl utility.

Now anytime we play a sound on our raspberry pi it should come through the bluetooth speaker.  But we still have an issue of auto-pairing the speaker so that we don't have to type all that in everytime, we want to just turn the speaker on and have sound.

We can auto connect with a helper script that will do this for us, then all we need to do is have our app call the script and ensure we are connected to our bluetooth device. So to our project let's add the a file called 'autopair' and add the following to the file:

#!/bin/bash
bluetoothctl << EOF
connect FC:58:FA:B2:A5:85
EOF

After we save the file we need to make it executable, go to the command line and type in:

sudo chmod +x autopair

Since the script is just a plain shell script we can run it separately from the command line to test it is working. So let's turn on the bluetooth device and run the script.

./autopair

You should hear the audible noise of the raspberry pi connecting and any sound the raspberry pi plays should now come through the bluetooth speaker.

Now that we have the audio connected, how do we play the mp3 file(s) of our horn and goal song? There are a few different options, I'll be using VLC Player as I'm a bit more familiar with it but we could have used the default OMXPlayer. Since the vlc player is not installed by default we will need to run apt-get in the following command to install the player.

sudo apt-get install vlc

VLC Player can be controlled from the command line with cvlc, our web app will call cvlc and pass the mp3 file to it to be played. while it is playing we want our goal light to be activated until the song stops. So let's create a new script called goal.py, this script will be responsible for playing the song and activating the light.

Let's create that goal.py file and add the following to our file:


import os, time
from gpiozero import LED
from signal import pause

led = LED(17)

def activate_experience():
  led.on()
  play_horn()
  led.off()

def play_horn():
  os.system('sudo ./autopair') # Ensure our speaker is still paired with our rpi
os.system('cvlc static/media/Carolina_Hurricanes.mp3 vlc://quit')

In the above code you can see we assign the GPIO pin 17 to the LED object. While our rotating light is technically not an led the LED object is a basic switch with on/off functionality. While the object does contain other functionality we will be using it as a simple switch.

The pin number will depend on which pin you have wired your raspberry pi to the controller. In this example I'm using 17.  If you are unsure of which pin is which your raspberry pi should have come with a handy GPIO charts or you can find your model and the pins here.

While it may be a bit hard to tell from the picture we attach a ground wire to a ground pin and the positive to pin GPIO 17 on the raspberry pi, then connect the positive/negative sides to our controller. If you connect to a different pin then just adjust the pin number used for the LED object in the code.


On thing, well actually a couple of things I really like about this controller is it looks more finished than having a breadboard and a bunch of wires everywhere and it has an "always on" plug so we can actually plug our raspberry pi's power cable into it and keep everything a little more self-contained. It would have been better if the raspberry pi's plug didn't cover up our "normally on" plug but for this project we are only plugging on thing in to be controlled so it'll work for now.


In the activate_experience method, we turn the light on, call the play_horn method and then turn the light off. 

In the play_horn method, we call our autopair script to ensure our bluetooth device is connected to the raspberry pi then play the mp3 that contains the goal horn and song. If you are playing the horn then song as separate mp3s just add an additional line(s) to play your files. I like the idea of modifying both into a single file as you can cross-fade and make the experience more seamless.

The last step in this series is to call our goal.py code from the web app. To do this we want to open the app.py file, add an import to the top of the file so that we can call the script.

import goal

then in the same file find the line that matches:

print("Play Horn!")

and replace it with 

goal.activate_experience()

Now our completed code should look like the following:

from flask import Flask, render_template, request
import goal

app = Flask(__name__)

templateData = {
    'title': "Carolina Hurricanes"
}

@app.route('/', methods=['GET','POST'])

def index():
  if request.method == 'POST':  goal.activate_experience()
    return render_template("index.html", **templateData)

if __name__ == '__main__':
    app.run(debug=True, host='0.0.0.0')


That's it! The only thing left to do is place the tablet in an open area so anyone can activate the experience. For the rotating bean, we tried several places but found it works best behind the t.v. , it keeps it out of the way and doesn't accidentally blind your family.

To complete our experience we had a good friend of ours use their cricut to make some rally towels.


Finally, get some Storm Brew, fire up the smoker for some pulled pork bbq nachos and other arena snacks and immerse yourself in the game.

And the next time Svech scores that Lacrosse goal....


Friday, January 22, 2021

Hockey Experience Project - Part 3

 If you just happened to land here on this page by accident or without reading part 1 or 2, this multi-part blog is how to bring home an NHL experience to your living room, complete with goal light, horn, song, etc.  I would recommend going back and reading part 1 and 2 to get fully up-to-speed with where we are and why we chose to do things in this manner.


Carolina GOOOAAALLL!

So hopefully somewhere between part 2 and today you did a little research and obtained the mp3s for the goal horn, song, and maybe a few logos. I won't be uploading or sharing my files due to possible copyright issues, I don't own the rights to those so I'll only be using them for my personal at home enjoyment.


I did find a pretty cool hockey rink image that is freely available that would be perfect to use as the main background for our webapp. 


We will save this to our project as hockey_rink.jpg in the static/media folder along with any other media files for goal horns etc.  Since I want to ensure the goal song is played after the goal horn, I combined the two together into a single mp3, that way there are less media files to worry about and I'm guaranteed the effects I want. Obviously, I could have kept them separate and just queued them one after another, but I like the simple approach better.

Our project structure should now look like this.


Time to get on that ice and make something happen!

So at this point we have a functioning webapp, although it is kinda lame and boring at this point and we have our media files. So let's add our background image and some functionality to the page.

If you were wondering why we created an empty libs and templates folder, well now we shall add some files to them. The libs folder will hold any css (Cascading Style Sheets) and js (JavaScript) we write. This will make maintaining the webpage much easier and also it is best practice to not just throw everything in one file.

If you are not familiar, Flask uses the Jinja templating language which will allow us to create html pages with certain data as variables then when we render the page we can pass the values of those variables. Technically Jinja will provide so much more to us but since this is a simple webapp for our own personal use and won't be exposed to the Internet there isn't really a need to cover it all in this blog.

Why is this useful to us?

Let's say we want to add a banner at the top of the page that should display the teams playing, such as: "Hurricanes vs Red Wings".  We could add this directly to the page in html like such:

<h1>Hurricanes vs Red Wings</h1>

The problem with this approach is we will have to manually update the html everytime there is a new game and that can be a pain and if you are like me you will eventually forget to do it before game time, you'll be rushed to change it and probably make a mistake and miss the first goal of the game.

With jinja we can simply add the team names as variables from the APIs we explored in part 1. If you skipped part 1 this may be a good time to go review.  So now our html with jinja would look like:

<h1>{{ away_team }} at {{ home_team }}</h1>

We could do this with any bit of data we want to change dynamically on the page, team logos, scores, power play time, empty goal status, etc.  We could even use jinja to control the design of our page by using jinja in our css class names for the html, tags this would allow us to give the page a 'theme' for the home team or just our favorite team(s). If you follow more than one team this may be the approach you want to go with. I'll be using this approach in my examples so when I want to watch Marc-Andre Fleury play I can give the page a Vegas Golden Knights theme.


Every good website always has a default 'index.html' page that is usually used for the homepage. For our use that will pretty much be the only page we need. We can always add more later if we have a need to. So let's add a new page called index.html under templates and add the following markup to the file.

<!DOCTYPE html>
  <head>
    <title>{{ title }}</title>
    <link rel="icon" href={{ url_for('static', 
          filename='media/Carolina_Hurricanes.svg') }}>
    <link rel="stylesheet" href={{ url_for('static', 
          filename='libs/css/site.css') }}>
  </head>
  <body>
    <div class="header"></div>
    <div class="main__content">
      <form action="/" method="POST">
        <button type="submit" value="" class="btn__goal">
          <img src={{ url_for('static', 
  		filename='media/Carolina_Hurricanes.svg') }}>
        </button>
      </form>
     </div>
  </body>

Our html is pretty basic as you can see from above.  We will add more to it later to give it a better team theme.

The main important part in our markup above is the form section.

    <form action="/" method="POST">
       <button type="submit" value="" class="btn__goal">
          <img src={{ url_for('static', 
  		filename='media/Carolina_Hurricanes.svg') }}>
       </button>
    </form>
Our form action "/" tells our application to go to the root of the website, which is the index page. So essentially it will just refresh itself when the form is sent to the backend server. The HTTP method we will use is a POST method, this is what the web app will look for to determine if it should kick off our 'experience'.

You'll notice I've used an image for my button, in this case I'm using a team logo, so instead of  a cheezy "Click me" button we just touch the team logo to make magic happen.

Now that we have our index.html template completed, for now, we will want to add some design to it.  In the head section you'll notice I've already linked our main css (Cascading Style Sheets) file so lets go ahead and create that file and add some styles.

Under the directory 'libs' we will create a new subdirectory called "css", this css folder is where we will put all our styles for our web app.  Go ahead and create our main css file called 'site.css' and add the following to that file.


body, html {
height: 100%;
   margin: 0;
}
.main__content {
    background-color: white;
    background-image: url('../../media/hockey_rink.png');
    background-repeat: no-repeat;
    background-size: cover; height: 100%;
}
.header {
    height:10%; margin: 0;
    background-color: rgba(204, 0, 0);
}
form {
    position: fixed;
    top: 60%; left: 50%;
    transform: translate(-50%, -50%);
}
.btn__goal {
   background-color:rgba(255, 255, 255, 0.1); border: none;
}
In the above css we set the background color of the header section to one of the team's color of red, position the form that contains our button to be in the center of the screen, and add our hockey rink image as the background to the page. So when it is all put together what does the page look like?


Originally I thought about using a puck as the button icon, thought it would be more fitting but the logo is a nice size for someone to lean over and tap and still looks pretty good in my opinion.

Ok, so we have a basic page layout and some styling so that it is a little less boring, now we just need to add a bit more code to our main application file so that when the button is pushed and the post request is made we can tell the server to do something.

For this we will add the following code in our app.py file.

    from flask import Flask, render_template, request
    
    app = Flask(__name__)
    templateData = {
       'title': "Carolina Hurricanes"
    }
    
    @app.route('/', methods=['GET','POST'])
    def index():
        if request.method == 'POST':
           print("Play Horn!")    
        return render_template("index.html", **templateData)
    
    if __name__ == '__main__':
        app.run(debug=True, host='0.0.0.0')
    

Most of this should look familiar, we added the template data which is a json object to store the key: value pairs our template will render. Right now we are only setting the title of the page.
templateData = {
    'title': "Carolina Hurricanes"
}

We also modified the route to allow both GET and POST requests. 

To prevent the experience from kicking off everytime the page is loaded we added an if statement to check the request object's method, if the method was post then we know someone touched the logo aka button on the main page. To test this we will just print out "Play Horn!" anytime the button is pushed.

if request.method == 'POST':
   print("Play Horn!")

Once we save everything and run our app, if you forgot how from the command line or our terminal type in the following command:

python3 app.py
Now we should see our server come up, go to the server's ip and port 5000 in your browser and you should now see the page that looks similar to the one above, clicking the logo should also print the "Play Horn!" message to our console.

If your having issues or want to double-check your code you can go to my repo and pull or review the code for this section from my github repo.

In the next section Part 4 of our hockey experience will probably be the last section of this series where we put the rest of the solution together.

Friday, January 8, 2021

Hockey Experience Project - Part 2

 Putting it all together

This is the second part of a multi-part blog post on recreating an arena hockey experience at home. If you got here without reading Part I you can find it here

Part I TL;DR

In part 1 we covered the NHL APIs, which ones to use, how to find games, etc. We also realized that an automated approach may not work due to TV delays and such, so we came up with something a bit more manual. I may go back and update my web app to include automated score tracking later. I mean how cool would that be to display the current score on my web app.


Equipment Used

UPDATE: Turns out the bluetooth speaker is a bigger hassle than it is worth. The steps in this series continues to show how to work with it but I'll be trading mine out for a wired speaker.

Since our goal light plugs in to the wall, we could either splice the wires and wire up a breadboard to a relay or use the control relay I linked above that does this for us and we can just plug in multiple devices. I like this approach as it is cleaner, supports multiple devices, and I don't have to worry about electrocuting myself which is always a plus.

For the Android Tablet, this can be any tablet or device you can get a web browser on. I like the idea of the tablet as it makes it real easy to setup and anyone in the room could use it. If you didn't read part 1, I chose the Altec Lansing speaker merely based on the fact I already had one sitting around that wasn't being used. You could use any compatible speaker it doesn't have to be a bluetooth one. But I do like the idea that the speaker can be setup anywhere in the room.

Programs! Get Your Programs Here!

Our raspberry Pi can support a number of different programming languages, Java, Python, Node.js, Go,  Bash, etc, but before we begin writing code we need to pick one.  Most of my professional career as a Developer was spent writing Java code for both standalone and web applications. When I started doing more DevOps and systems related work I started using more shell scripting and Python. For this project I want something robust, fun, and easy to get started with.

I feel like this is a Pokemon moment, "I choose you Python" or more specifically Flask.

Why Python/Flask?
Somewhere a long time ago I read some Python documentation that suggested when you comment your code it should be done in the style of Monty Python, the comedy group. While by today's standards that is probably a bad idea, I've always enjoyed watching Monty Python and loved the idea of this so I use Python whenever I can.

Ok so here is a more valid list of reasons:
  • Python is easy to learn
  • Most *nix systems, including our raspberry pi already has Python installed
  • Python is an interpreted language so we don't have to compile it
  • Python is a mature language and we can easily find support on forums, etc
  • Freely available libraries, including the GPIO Zero library we will use to activate our goal light.
  • Flask is a web application framework that can be easily customized to our needs.
  • Flask has a built-in webserver we can use for development.
  • Our application is static, meaning the content won't really change, Flask is perfect for small static apps.
What about Django you say. We could very well have used Django for this, it is a very mature web framework with a lot of support, but my focus right now is on time. We need to get something going quickly, and I know with a few lines of code I can get a static Flask app up and going pretty quick.

 Puck Drop

If you haven't done so already, you will need to setup your raspberry Pi. I'm not going to go over how to put your raspberry pi together and do the initial setup, but if you need them you can find them here. Go ahead and get the Raspbian OS installed, WiFi setup, etc. You can plug a monitor, keyboard, mouse, etc in and work directly on the raspberryPi if you wish or following these instructions you can setup a Remote Desktop (RDP) session, which I will be using in my examples.

I prefer the RDP method as it allows me to use my MacBook to connect remotely to the pi where my development environment and IDE will be installed at. If you are going to hookup a mouse and keyboard directly to the raspberry pi, just make sure you use USB devices and not bluetooth ones since our speaker will be paired via bluetooth.

If you don't have a favorite IDE to use on the raspberry pi I would recommend installing VSCode as your editor it has a lot of great extensions to make your life so much easier and it is faster than Eclipse or IntelliJ and IMHO it is way better than the Python editors Thonny or IDLE. 

VSCode isn't in the package repository but you can use the web browser on your raspberry pi to download it, just be sure to grab the 32-bit ARM .deb package unless you know for sure you have a 64-bit OS on your raspberry pi.

Ok, let's get started!

Lets create a new directory for our application, we will call it 'nhl_webapp'. VSCode allows us to open a terminal directly in the IDE which can be faster to create the base files/folders on the command line.

mkdir -p nhl_webapp nhl_webapp/templates nhl_webapp/static nhl_webapp/static/media nhl_webapp/libs
cd nhl_webapp
Initialize our project as a git project
git init

There are a few files we will need to get started. We can use the 'touch' command to create the empty files in one entry.

touch app.py .gitignore README.md
  • app.py  - will hold our main web application code
  • .gitignore - Since I'll be using git to manage my code this allows me to omit certain files/folders from being checked in.
  • README.md - Markdown file that will describe our project and tell others how to use it.
Next we will create our virtual environment and activate it. The virtual environment will be used to install our dependencies to and run our application.

python3 -m venv env
source env/bin/activate

Great, now lets install Flask, GPIOZero and their dependencies to our virtual environment.

python -m pip install Flask gpiozero

We don't need to check in our entire virtual environment to git but we do want to ensure we capture the requirements for others, so lets add the `env/*` folder to our .gitignore and capture our requirements in a separate file.

python -m pip freeze > requirements.txt

cat env/* > .gitignore

So now our file structure should look like the screenshot below. 


Let's add some code and test that everything is working.

In VSCode open the app.py file and add the following code and save the file. If you don't want to type it out you can find the source on my github repo.


Now to test this basic application. 

In the terminal window type the following to start the application. Because Flask comes with a built-in dev web server, starting the app will also launch the web server on its default port of 5000.

python3 app.py

If everything worked we should see the server startup.


Now let's see what the web app looks like in the web browser. Open Chromium or whatever browser you have on the raspberry pi and go to the address of http://localhost:5000 If all went well we should see the page with "Our NHL WebApp" on it.


So now we have a functioning Flask web app, although at this point it is very basic and doesn't do anything other than print our text. 

If you are using git and have a remote repository, now may be a good time to commit those changes.  If you are unfamiliar with git there are a lot of free resources on the web to learn git. Git is a great way to keep track of all your changes in a code repository so if you ever accidentally delete a file or make a change that breaks something it is easy to go back to a previous version of your code. It also allows you to see what you changed and when.

In our next steps we will add some colors, graphics, and a button to activate the goal horn and goal light to tie it all together. So this is a good time to search the web for some free hockey graphics, team logos, and an mp4 of the goal horn.


Monday, December 21, 2020

Hockey Experience Project - Part 1

Preseason Activities 

The family and I are big hockey fans, during a normal year we are either at PNC Arena watching the Carolina Hurricanes, watching them on T.V., or discussing the upcoming season.  So when Covid-19 hit the U.S. and Canada the rest of the NHL season was cancelled. Through the summer we watched reruns of past games and kept tabs on when or if playoffs would even happen.  


We were excited when the NHL announced playoffs were coming, but saddened to learn it would be done without fans.  If you have never been to an NHL playoff game, GO! (Well, once we are allowed to go that is). Even if you don't care for hockey you will have a great time. The phrase "There is nothing like playoff hockey" is absolutely true and I wanted to bring that same experience to our home. 

So how do we bring the playoff hockey experience to our living room?

We have a big screen t.v. to watch the game on and the family and I will definitely be cheering loudly, but what about the rest of the experience. When the Canes score there is no goal horn, no goal song, no flashing goal light, no rally towels to swing around. What about during intermissions when we want to drink an overpriced beer and snack on our favorite foods from the concession stand?

Ok so in order to pull off this experience we are under a time crunch, 2 months, to figure out quite a bit and see how far we can get to a legit stadium experience. Food and drinks can be sorted later if we get the rest of it going so let's get to the first part.


Action!Lights!Goal Horn!

I've heard of a few raspberry pi projects where fellow hockey fans created programs to pull scores automatically and displays scores or flash a light.  So I knew the possibility is there but how do we put it together and expand on that.

As luck would have it I received a $100 Amazon gift card as a gift. So now I knew what I wanted to do was possible, I had the desire to do it, and now I've received funds to make it possible. Let's get to work!

I've always wanted to get a raspberry pi to play around with and now I have an excuse. Checking Amazon pricing I could get a Canakit Raspberry Pi 3B+ Starter kit that has everything I'll need to get started for just under $100.  Sure, I could have paid a bit more and got a Pi4, but the 3B+ will have plenty of processing power and features to do exactly what I want and more.

So while we await for our Amazon delivery on to the next problem, where do we get the scores from so that we can make this into a completely automated system.

SCORE!

Or should I says scores. After much googling around, I found there are quite a few 'real time' sports API sites, but they all want $$ and there is no guarantee the scores are truly live or that they have NHL scores. I mean, even when watching the game on t.v. there is a delay from when the action actually occurred and when it was broadcasted. To add to that we will be watching the games on YouTube TV which is a streaming service, so it is a bit of an unknown how real time we will be seeing things. 

Further googling I found some documentation on the NHL's APIs that don't require signing up for a service or an API key to access! Score! You can check these out here

Now for some test runs of the APIs to get an idea of what information we will get back. We will use Postman to make the API calls and verify the information. If you've never used Postman before, its a great tool for testing APIs and is free for individual developers. While this is a manual step in the process, this will help us identify which APIs we want, what data we will get back and the expected format so when we write the actual application we know which APIs to use.

A note on calling APIs 

    Some of these APIs return quite a bit of information, there are APIs for getting team info, schedules, player stats, team stats, game scores, etc. You always want to pick the APIs for use that return just the data you need so you save on bandwidth and processing. I mean if you simply want to know the score of a particular game, then you don't want to pull all game scores with expanded player stats, you would want to call the API for that game and keep it simplified. 

You also want to ensure you aren't calling the APIs every millisecond. It may seem like a good idea and think you are getting the most up-to-date information, but more than likely your calls will be seen as a DoS attack and your IP will get banned real fast.

Under Further Review

Ok, lets make some calls and validate what we want. If you have taken a minute to look at the Teams APIs, you'll notice everything uses a teamId. This is an internal id that identifies each team's data. So let's find out what Carolina's teamId is. 

NOTE: If your not a Carolina fan, you can use the same calls just substitute your team's id where we use Carolina's. 

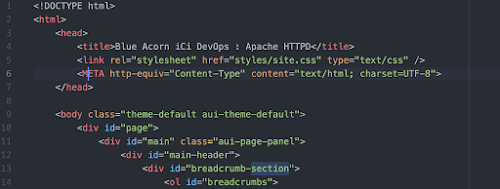
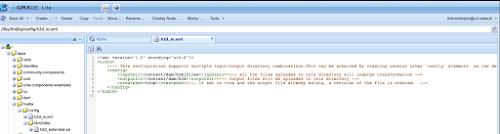
Our first call is to get all the NHL teams:

As you can see in the screenshot above, we make a HTTP GET call to https://statsapi.web.nhl.com/api/v1/teams to get all the teams. Scrolling down through the list or doing a find we find Carolina's info around line 390. There is a lot of info on the team here, but the part we are interested in is the line with 'id: 12' . The number '12' is what we will use in future calls to get Carolina's data. 

To test this we can add '?teamId=12' to the same API call as before to get just Carolina's team data.


Success! 

When we write our program we can just use '12' as the teamId variable so we will just make note of it, it shouldn't ever change so there is no need to constantly look it up.


Is Aho Playing Tonight?

In order to get the live scores on the day of the game we will need to know the gameId ahead of time. The gameId is much like the teamId in that it is a unique identifier so that we can get data about just the game we are interested in. We can reasonably expect this gameId to be different for each game the Hurricanes are playing in. So our program will need to first pull the schedule and get the gameId for the Carolina game.

If we look at the schedule API documentation, there are quite a few parameters we can use to get to the data we want.  We will use the variables teamId=12 and date=currentDate to see if there is a game and if so get its id. As a test I know the published schedule shows one for the 14th so we will use that date to see what we get back.


If we scroll through the results there is some info on the teams playing, venue the event is held at, etc. The part we are interested in is the gamePk, that is the unique identifier for this game, they also give us a nice link to the live feed. 
 
 If our team wasn't playing on that day we would get an empty array back for the dates field. So now we can poll the schedule once a day to find out if our team plays, if they do we can get the time from the schedule and beginning at that time start polling the live feed more frequently for scores.

Before we start calling the live feed, which can return over 30k lines of data and includes all the plays, etc. We will want to take a look at what is available from the docs and choose the call that best fits our needs.

There is boxscore and linescore that returns far less data but still more than what we need. If you still want to use the live feed, I would suggest taking a look at the diffPatch option. This allows you to give a date/time parameter and the feed will return ALL changes since that date/time.

Game Delay

Meh. So after doing some testing the APIs are only updated every minute when there is an update. Although hockey is usually a low scoring game it is very fast paced and a 3 point lead can be lost in a minute of game play. So knowing my APIs will be at most 1 minute off, and the unknown of how delayed my streaming service is going to be at any given moment I need a better solution so that everything is in synch. 

No one wants to watch their team score then 3 minutes later the goal horn plays or vice versa.  To get the full experience you want to see the play, hear the goal horn followed by the goal song. I could do a few trial runs and put a delay in to synch the t.v. with the app, but streaming services are at the mercy of your Internet connection and could randomly fall further behind or buffer and catch up.


A Manual Intervention

The only way to keep everything in synch is to perform some sort of manual task or execution of the program. That way when I see the action I can execute my program and get the experience I want.

But what if I'm not in the room when they score, also I don't really want to lug my laptop around the house just to run this program. I mean the program will be executed from my pi and I don't want to fumble with ssh sessions or try to educate my family on how to execute programs from a command line. If this is a manual task it should be simple to do and execute immediately so that the overall hockey experience isn't lost.

 I just remembered, I have an old tablet just sitting in the closet. We acquired it some time ago when everyone had one of those deals "Add a new line and get a free Android tablet". We used the tablet for a brief time period, then it was only used when traveling, and finally just went to the closet. 

Time For Some Web Work

Ok, so I think we finally have our solution that we will build in part 2 of this blog. I'll create a web application that runs on the pi, we can use the tablet to access since all we should need is a basic browser it doesn't matter which one we use or how old it is. Our web app will at a minimum display a button that when clicked will play our team's goal horn followed by the goal song.

If you aren't familiar, every NHL team has their own goal horn and goal song. Here is the one for the Carolina Hurricanes that I'll be putting together. 

NOTE: I'm not using YouTube or anything off of it, I'm only referencing it here to give you an idea of the sound I'll be playing.

Oh crap, the raspberry pi doesn't have a speaker. 

Oh wait! back to the closet of lost tech toys. I got it, we have an old Altec Lansing bluetooth speaker that no one uses anymore. It was one of those purchases we could take to the pool, yes its waterproof, to play music from our phones while at the pool. It too got used for awhile before it was sent to the closet.

Ok so we are still on track. When someone clicks a button on our webapp from the tablet, the pi will play the goal horn followed by the goal song and turn a goal light on.

So searching Amazon I decided to get this light. Its cheap, simple and will give me the effect I'm looking for.


Checkout Part 2 of the Hockey Experience Project for how we will put it all together.

Thursday, September 10, 2020

Convert Confluence Documents to AEM/XML

 Atlassian's Confluence is a great tool for managing and sharing project documentation with your team and its seamless integration into Jira can help put everything into one place.  We've used Confluence and Jira for almost all documentation, from general project docs, to How-Tos, and even New Hire Onboarding. 

Recently I started going through the process of rewriting our training material for DevOps Engineers and found quite a lot of duplication in documentation. For some topics such as 'Git', Adobe Experience Manager, and other topics there were documents created for both front-end and back-end developers as well as Project Managers, QA Engineers, etc.

As I discovered all this duplication and extra work I thought, there has to be a better way, we have too many people creating and maintaining the same thing over and over with only slight variations. My first thought was to move common documents to a shared location and assign owners. This would enable different groups to cross-reference material already documented for their respective teams  The dev team would own and be responsible for creating and maintaining 'git' and code related topics, the devops team would be responsible for topics on AEM setup, configuration, troubleshooting, etc. 

While moving everything around in Confluence and assigning owners may help reduce the number of people updating documents, it doesn't solve the issue of ensuring the documentation fits the audience. Project Managers probably care very little about how to do a git merge and squash those commits, but may need to know general info, such as what git is, how it can be used on a project (without getting too far in to the technical weeds).

Through my searching to find a better way, I stumbled across Dita (Darwin Information Typing Architecture).  After reading up on it, I realized this is what I was looking for; a way to create documentation in a standardized way once and have it rendered to fit the needs of the audience. 

Much to my dismay, Confluence doesn't have a Dita plugin or support it directly. So this means I would either need to recreate all our documentation into the Dita format or find a way to easily convert it.  

Having worked on numerous AEM projects as a Full-stack developer, DevOps Engineer, and AEM Architect, I remembered there is an XML Documentation feature for AEM that should do what I want. But first, I need to export my content from Confluence.


Exporting Confluence Documents

Confluence makes it very easy to export a document or an entire space in multiple formats, from pdfs, MS Word documents, HTML, etc.

In this example, we are going to export the entire space, this will give us all parent pages, child pages, assets, styles, etc.  

To export a site in Confluence, go to: Space Settings -> Content Tools -> Export.


NOTE: While there is an export to xml option, this won't meet our needs. However the export to html option is perfect for what we want as the XML Documentation feature also provides some workflows to convert our html documents into Dita topics.

Select 'HTML', and click 'Next'. 

Confluence will gather up all our documents and assets, convert the docs to html and package in a zip file for us to download.


After downloading and unpacking our zip archive, examining the content we can see each page is represented in html, contains references to other html pages in our space, but it also contains ids, attributes, and even some elements that are very Confluence specific. 


Since we will be using AEM to render the documents, we don't need a lot of the class names, ids, and other bits Confluence added for us. It is also important to note, that our documents need to be in xhtml format before AEM will convert them to Dita. 

If we uploaded this document as-is we can expect nothing to happen,  this document would not be processed by the workflow. If we simply add the xml header to identify this document as an xhtml document, the workflow would attempt to process the document, but would fail with many errors. So we will need a way to pre-process them to clean them up.


Cleaning Up With Tidy

If you are not familiar with HTML Tidy, it is a great command line utility that can help cleanup and correct most errors in html and xml documents. While we are not expecting that we have any "bad" html, we know we will probably have some empty div elements, Confluence specific items, and since we are processing hundreds of documents we want to ensure they meet the xhtml standard and are as clean as possible without the need to manually go through each one individually correcting errors.


Create a Tidy Config

A Tidy config will help ensure all documents are pre-processed the same way. so that we have a nice uniform output. using your favorite text editor, create a config.txt file that will hold the configuration below.

clean: true

indent: auto

indent-spaces: 4

output-xhtml: true

add-xml-decl: true

add-xml-space: true

drop-empty-paras: true

drop-proprietary-attributes: true

bare: true

word-2000: true

new-blocklevel-tags: section

write-back: true

tidy-mark: false

merge-divs: true

merge-spans: true

enclose-text: true

To read more about what each of these settings does and other options available, check out the API doc page.

Instead of going over every option used above as most should be self-explanatory as to what they do, there are a few that need to be called out.

  • output-xhtml - Tells Tidy we want the output in xhtml, the format we need for AEM to process.
  • add-xml-decl - Adds the xml declaration to our output document
  • new-blocklevel-tags - Confluence adds a 'section' element to all out pages, this element does not conform to xhtml and Tidy will throw an error and refuse to process those docs unless we tell Tidy that it is an acceptable element. NOTE: This is a comma separated list of elements, so if you have others feel free to add them here. 
  • write-back - write the results back to the original file. By default Tidy will output to stdout. We could create a script to create new files and leave the original alone. But since we have all the originals in the zip file still we will overwrite the ones here.
  • tidy-mark - Tidy by default adds metadata to our document indicating that it processed the output. Since we want our output to be as clean as possible for our next step we don't want this extra info.
NOTE: I'm using the settings: drop-empty-paras, merge-divs, and merge-spans to account for any occurrences where the original author unknowingly created extra elements, which is very common when using wysiwyg (what you see is what you get) editors. Authors will sometimes hit the enter key a few times to create formatting, unknowing that behind the scenes they are adding extra empty <p> elements.


Processing with Tidy

After we have created our configuration file, we are ready to begin processing the files. We tell tidy to use our configuration file we just created and to process all *.html files in our directory that we unzipped our documents into.

$ tidy -config ~/projects/aem-xml/tidy/config.txt *.html

Depending on how many documents you have and the complexity of them, tidy should complete its task anywhere from a few seconds to a minute or two. If we reopen our document after tidy has processed it we should now see proper xhtml.


As you can see above, our document has been reformatted, the xml declarations and namespace have been added and if there were any issues with our html it is now resolved for us as well.


Scrolling to the bottom of the page, you can see the html <section> tag(s) are still contained in the output as well as other class names and ids.


You will also notice our images that are contained in the attachments folder have the following markup:


Once our documents are imported and processed in AEM our images will need to be uploaded to the DAM. Which will either change their path or add "/content/dam/" to the path. If we forget this step, good luck trying to reassociate the images back to the original docs.

If we attempted to import our documents at this point our workflows would process these documents but not create proper Dita Topics from them and would require even more manual work for each document. 

The XML Documentation feature for AEM will allow us to apply custom XSLT when processing our documents so that they end up as Dita topics and recognized in AEM as such.


Applying Custom XSLT in AEM

In this next step, we will need access to an AEM Author instance and the XML Documentation feature installed.

After examining our documents we know there are a few tasks we need to perform to clean them up a bit further.

  • Remove empty elements
  • Remove all class names and ids
  • Update our image paths
First we want to upload all the assets in the attachments folder to the dam. We will put these in "/content/dam/attachments/...". Take a quick peek in the images directory that was exported to determine if there is anything we need and upload as appropriate.  If not, you may also need to update/remove those elements in our documents when we import them.

Open crxde, http://<host:port>/crx/de/index.jsp, and log in as an administrator. We will need to create an overlay so that we can specify our input and output folders for the workflow.

Copy the /libs/fmdita/config/h2d_io.xml file to /apps/fmdita/config/h2d_io.xml, and update the inputDir and outputDir elements to the path(s) you will be using.


You will notice there is already a subdirectory html2dita with a h2d_extended.xsl file.  When html documents are uploaded to our input folder, in addition to the default processing, this file is also included by default in that process. 

Out-of-the-box the /apps/fmdita/config/html2dita/h2d_extended.xsl file just has the xsl declaration and nothing else. We will add our transformations to this file so that everything uploaded is processed the same way.

We will create an identity template to do the majority of work for us. While this is very general and applies to all elements, you should definitely examine your own data first to determine how best to process it.


Images are a little more work to get right, but not overly complicated. We want to ensure we are only modifying internal images and not ones that may be linked from other sites, in other words the src attribute should start with 'attachments'. Also ensure to take note, our XML editor is expecting the element tag for images to be <image href='<path_to_file>'/> and not the xhtml <img src='<path_to_file>'/> element.


Once we have our transforms in place we are ready to upload our data. The XML Documentation feature comes with a few different workflows to process html documents once uploaded. 


This will allow us to either upload our pages individually one by one, or we can repackage them into a zip file and upload that zip file to our input folder. Since we will be uploading a few hundred pages the zip option will be the one we want to go with.

If we wanted to merely test our process, we could pick one or two html files and upload just those. Watching the logs and checking the output folder will give us an indication if everything is working correctly or if there are additional transforms or cleanup that will be required.

After uploading we can switch to our XML Editor in AEM and see the new *.dita files in our output folder that we had previously defined. Each file is named 1:1 for its original filename. So if we had uploaded a file 123.html to our input folder, there should now be a 123.dita file in our output folder.


If our cleanup and transforms worked properly, we now can double-click on any of these new *.dita files and see the results of our hard work.


Conclusion

Using a few widely available tools we can successfully migrate documents from Confluence into AEM using the XML Documentation features. Of course this is merely one step in the process of many for performing a true migration and fully using Dita to our benefit. Once the documents are in the Dita format, a Content Author familiar with Dita should go through the documentation looking for areas of reuse, identify audiences, create maps, etc.

If you are serious about working with Dita you should consider using a compliant editor such as Adobe Framemaker. Framemaker can be integrated with AEM to provide a better experience for your team to create Dita documents, collaborate, and publish them in Adobe Experience Manager.